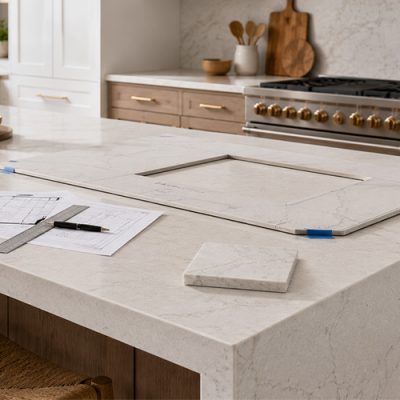
If you are wondering what the countertop installation process looks like from start to finish, here is the short version: a free design consultation, materials approval, professional fabrication off-site, and installation typically completed in one day. The countertop replacement process from consultation to completed installation runs approximately 2 to 3 weeks depending on material and project complexity.
You have made the decision. You know you want new countertops. Maybe you have already visited our showroom, fallen in love with a slab, and now you are wondering: what actually happens next? How long will this take? How disruptive will it be? What do I need to do to prepare?
These are exactly the right questions, and you are not alone in asking them. At i4 Kitchen & Bath, we have guided hundreds of Orlando homeowners through this process, and we know every question before it gets asked. This guide walks you through every stage of the journey from your perspective, not ours, so you know exactly what to expect at every step.
Key Takeaways: What Orlando Homeowners Need to Know Before Installation Day
- The countertop replacement process from consultation to completed installation typically takes 2 to 3 weeks.
- Most standard kitchen countertop installations are completed in one day.
- Seams are common in larger kitchens and complex layouts. Expert installation minimizes their visibility, though some may still be noticeable depending on pattern, lighting, and slab size.
- Caulk cure time varies by product and conditions. i4’s team will give you specific aftercare instructions before they leave.
- The first step is a free design consultation. You do not need to have everything figured out before you come in.
The Full Countertop Process From Start to Finish
| STAGE | WHAT HAPPENS | TYPICAL TIMEFRAME |
|---|---|---|
| Design Consultation | Meet your designer, discuss vision, select material direction, take measurements | 1 day |
| Material Selection | Select the perfect countertop style, color, finish, and edge | 1 day, but it can vary; depends on each homeowner |
| Templating and Fabrication | Precise template taken on-site, countertop cut and finished off-site to exact specifications | Templating: 1 – 2 daysFabrication: after template approval, 10 to 14 business days |
| Preparation Day | The homeowner should clear countertops, remove under-sink items, and plan how to secure pets | Day before installation |
| Installation Day | Old countertops removed, new pre-fabricated pieces installed | 1 day for most standard kitchens |
| Finishing Touches | Caulking, cleanup, final adjustments, and sealing if the material requires it | Same day as installation |
| Total Process | Consultation to completed installation | Typically 2 to 3 weeks |
Timeframes reflect typical industry ranges for countertop replacement projects in Orlando. Your i4 designer will give you a precise timeline for your specific project at the free design consultation.
Countertop Selection to Installation in Orlando, FL
Most homeowners come to us feeling a little overwhelmed. There are decisions to make, workers coming into your home, and your kitchen temporarily out of commission. After doing this for decades in Orlando, we can tell you: the process is much more manageable than it looks from the outside. The seven steps are clear, the timeline is predictable, and at every stage you know exactly what is happening and why.
How Long the Full Process Takes From Start to Finish
For most countertop replacement projects in Orlando, the process from first consultation to completed installation typically runs 2 to 3 weeks. Here is how that breaks down: the design consultation and material selection typically happen in the first visit. Templating, where precise measurements are taken of your actual space, is scheduled shortly after. Fabrication takes approximately 1 to 3 weeks depending on the material chosen and current demand. Installation is typically completed in one day for most standard kitchen projects. Finishing touches, including caulking, cleanup, final adjustments, and sealing if your material requires it, happen the same day.
At i4 Kitchen & Bath, our team also provides a digital visualization of your new countertops before fabrication begins, so you can see exactly how everything will look before anything is cut. Your designer will give you a precise timeline for your specific project at the free design consultation.

Step 1: Questions to Ask Yourself Before the Countertop Design Consultation
Choosing countertops is exciting, but it can also feel like a lot. Material, color, pattern, finish, edge profile, durability, maintenance, price, wow, there is a lot to think about! Before you fall in love with a slab, take a step back and ask the right questions. A beautiful countertop should not only look good on installation day. It should fit your home, your lifestyle, and the way your family actually uses the kitchen or bath every day.
Questions homeowners should ask themselves before a design consultation
How do we really use this space every day?
Do you cook every night? Do the kids do homework at the island? Do you entertain often? A busy family kitchen needs a different surface than a guest bathroom vanity or a coffee bar.
How much maintenance am I honestly willing to do?
Be real with yourself here. Are you okay with sealing natural stone, wiping spills quickly, and being careful with acidic foods? Or do you want something easier, like quartz, that does not need sealing?
Do I want a clean, consistent look or natural variation?
Quartz gives you more consistency from sample to slab. Granite and marble give you natural movement, color shifts, and one-of-a-kind patterns. Both can be beautiful, but they feel very different.
Will this color still make me happy in 5 to 10 years?
Trendy colors can be fun, but countertops are a major design feature. Ask yourself whether the color works with your cabinets, flooring, backsplash, lighting, and future style changes.
Do I want the countertop to be the statement piece or the supporting piece?
Some homeowners want bold veining and drama. Others want the countertop to quietly support the cabinets, backsplash, and fixtures. Neither is wrong. You just need to know what role the surface should play.
How much natural light does the room get?
A countertop can look very different under showroom lighting than it does in your home. Orlando homes with large windows and strong sunlight may make white, glossy, or heavily veined surfaces look brighter and more reflective.
Do I need extra durability around a sink, cooktop, or island?
High-use zones matter. Around the sink, you want moisture resistance. Near the cooktop, you want to think about heat protection. On the island, you may want a durable finish that handles daily activity.
What edge profile fits the style of my home?
A simple eased edge feels clean and modern. A rounded edge feels softer and family-friendly. A decorative edge can add a more traditional or luxurious feel. The edge may seem small, but it changes the whole look.
What is my real budget, including installation details?
Do not look only at the slab price. Ask yourself if the budget includes material, fabrication, edge profile, sink cutouts, removal, backsplash, and installation. Those details matter.

Step 2: The Design Consultation: What You Will Experience
The design consultation is where everything starts, and for most homeowners it is also where the anxiety starts to lift. Here is exactly what you can expect from your first visit.
What Most Homeowners Feel Walking In
Walking into a showroom for the first time can feel a little intimidating, especially if you are not completely sure what you want yet. You might be worried about making the wrong decision, or feeling like you need to have all the answers before you even sit down with a designer.
A lot of our clients tell us the same thing after they visit: “That was easier than I expected.”
There is no pressure, no rushing, and no need to have every decision figured out before you walk in. That is what our design team is here for. Bring your ideas, your questions, and the things you know you want. We will help you sort through the rest.
What You Need to Bring and What You Do Not
A few things that make the consultation more productive:
- Photos of your kitchen, even a quick snapshot on your phone works perfectly
- A cabinet door sample or a photo showing the color and finish of your cabinets
- Any inspiration images you have saved, from Pinterest, Instagram, magazines, or anywhere else
- Rough measurements of your countertop space if you have them, though our team will take precise measurements too
What you do not need to bring: a final decision on material, a specific color in mind, or a firm budget number. Those conversations happen naturally during the consultation. If you want to get a head start on measurements before your visit, our guide on how to measure for new kitchen counters walks you through it step by step.
Questions to Ask Your Kitchen or Bath Designer
The consultation is a conversation, not a test. The more questions you ask, the more tools you will have to make the right choice.
Remember, the best countertop is not just the prettiest one in the showroom. It is the one that fits your lifestyle, your design vision, your maintenance comfort level, and your budget. The job of our kitchen and bath designers is to help Orlando and Central Florida homeowners compare materials side by side, understand the pros and cons, and choose countertops that are right, beautiful, and practical for everyday life.
Below are some useful questions to ask the designer.
Which countertop material fits my lifestyle best?
Ask your designer to compare quartz, granite, marble, quartzite, porcelain, or solid surface based on how you actually live, not just how the material looks in photos.
Is this material a good fit for Orlando’s climate and my specific room?
For indoor kitchens, low-maintenance materials like quartz often make sense. For direct-sun areas, your designer may recommend a surface with better UV performance, such as porcelain or certain natural stones.
How will this countertop look with my cabinets, backsplash, flooring, and lighting?
Countertops should not be selected in isolation. Ask your designer to look at the whole room so the colors, undertones, and finishes work together.
Where will the seams be placed?
Seams are normal in many countertop installations, especially with large kitchens, islands, corners, and long runs. A good designer or fabricator will explain where seams are likely to go and how they can be minimized.
Which finish is best for my kitchen, polished, honed, matte, or textured?
A polished finish is often the easiest to clean for busy kitchens. Honed and matte finishes can look beautiful, but they may show fingerprints, water spots, oils, or residue more easily.
Which edge profile do you recommend for this design?
Ask your designer to explain how the edge affects the style, comfort, safety, and cost. For example, a simple eased edge may fit a modern kitchen, while a softer rounded edge may work better for a family-friendly space.
Does this material need sealing or special maintenance?
Quartz does not need sealing. Granite, marble, and quartzite may need sealing depending on the slab, finish, and use. Ask for clear care instructions before you commit.
What is included in the installed price?
Ask whether the quote includes material, fabrication, standard installation, sink cutouts, edge profile, removal of old countertops, backsplash, and any extra labor.
How long will the process take from selection to installation?
For countertop-only projects, it typically takes 2 to 3 weeks from selection to installation. However, timelines can vary on material availability, final measurements, fabrication, and scheduling. Your designer should give you a realistic timeline before installation day.
What should I do before installation day?
Ask how to prepare your kitchen or bath. Most homeowners need to clear countertops, empty sink cabinets, remove fragile items, create a work path, and keep pets away from the installation area.
What warranty applies to this material?
Ask about the product warranty, fabrication warranty, installation warranty, and what could void coverage. This is especially important with premium brands and authorized dealer products.
During the consultation, our designer will guide you through all the countertop options based on how you use your kitchen, your cabinet style, and what you are hoping the finished space will feel like.
This is the moment to raise any concerns or questions. Changes at this stage are easy. Changes after fabrication has begun are significantly more complex and may affect your timeline. Do not hold back.
For a deeper guide on choosing the right quartz color, finish, and thickness, our article on how to choose quartz countertops in Orlando covers every decision in detail. None of these choices are locked in after one conversation. There is always room to refine.

Step 3: The Fabrication Phase: What Is Happening While You Wait
After your design is approved, your project moves into fabrication. This is the stage where most homeowners feel the most impatient, and we completely understand that.
How Long This Takes and Why
Fabrication begins with templating, where a member of our team visits your home to take precise physical measurements of your actual kitchen space. These measurements are what the fabrication facility uses to cut, shape, edge, and finish your countertop pieces to exact specifications.
After template approval, fabrication typically takes 10 to 14 business days depending on the material you have chosen and current demand. Engineered stone like quartz is often processed faster than natural stone, which may involve additional sourcing and preparation time. We will give you a specific timeframe at your consultation based on your material selection.
What Homeowners Ask Most During This Fabrication Stage
The two most common questions during fabrication are whether changes are still possible, and how you will know when your countertops are ready.
On changes: small adjustments may still be possible depending on where your project is in the process, but changes after templating and cutting have begun can affect your timeline and may involve additional costs. The earlier you raise any concerns, the easier they are to address.
On timing: i4’s team will keep you updated throughout fabrication so you always know where your project stands. When your countertops are ready, your installation day will be scheduled at a time that works for you. If you have questions at any point during this stage, your designer is your direct contact.
i4 Team Insight: If you are choosing a bold veined material, like a Calacatta-style quartz, ask your fabricator about book-matching before fabrication starts.
Book-matching is when two slabs are placed side by side so the veining mirrors across a seam or waterfall island. It is not needed for every project, but when the layout is right, wow, it can make the whole kitchen feel more custom.
This is one of those details you want to talk about early, before anything is cut. It can affect which slabs you choose, where seams go, and how the final pattern flows.
Renovate Countertops With Confidence
High-quality craftsmanship, smart design, and clear communication. Schedule a free consultation by calling (407) 246-0636 or filling out a contact form.
Step 4: Preparation Day: What You Need to Do Before the Team Arrives
This is the one stage of the process that is entirely in your hands. The more prepared your home is before the team arrives, the smoother installation day goes for everyone.
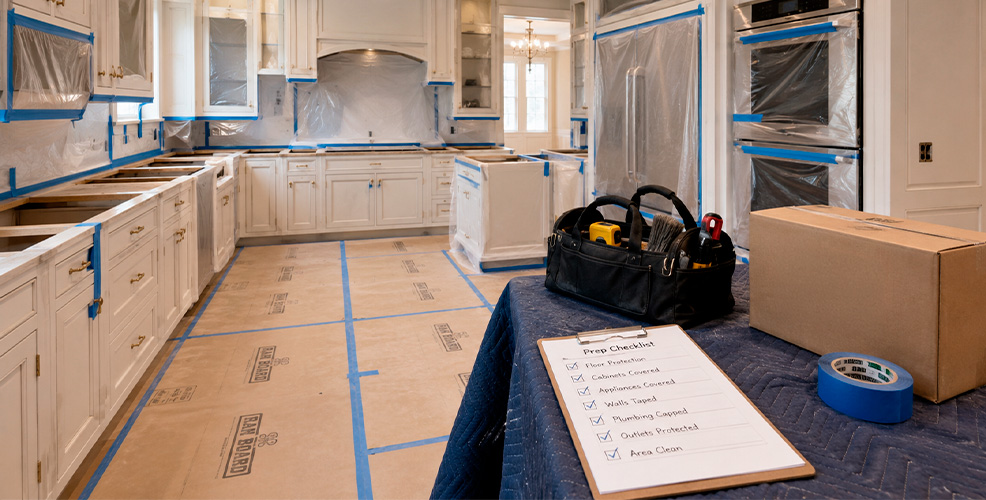
Your Checklist for the Day Before Installation
Here is exactly what to do before the team arrives:
- Clear everything off your countertops completely. Every appliance, every item, every decoration. The surface needs to be completely empty.
- Remove everything from under-sink cabinets.
- Secure pets in another room or arrange for them to be elsewhere for the day. Installation involves noise, movement, and open doors that can be stressful for animals.
- Confirm that you or a trusted adult will be home for the entire installation day. Someone needs to be available to answer questions and approve decisions as they come up.
- Plan for meals that day. Your kitchen will be out of use during installation, so a simple plan for lunch and dinner removes one less thing to think about.
- Save your designer’s contact number in your phone in case any questions come up on the day.
What to Expect When the Team Arrives
The team will do a walkthrough of your space before anything is removed. They will confirm the layout, review seam placement, and make sure everyone agrees on exactly what is happening that day before work begins. No surprises.
Installation involves noise and some dust, particularly during the removal of your old countertops. That is the loudest and most disruptive part of the day, and it is typically over quickly. Our team protects your floors, cabinets, and surrounding surfaces throughout the process. We treat your home with the same care we would treat our own.
If your kitchen is in an older home with walls that are not perfectly straight or square, mention that to your designer before templating. Older Orlando homes, particularly those built before the 1980s, sometimes have walls with slight bows or angles that affect how countertop edges fit against the wall. Our team accounts for this during templating, but knowing in advance helps us plan the best approach for your specific space.

Step 5: Installation Day: What It Actually Looks Like in Your Home
Installation day is the moment everything comes together. By this point, your countertop pieces have been precisely fabricated to the exact measurements of your kitchen. They are not being cut in your home. They arrive ready to fit.
How Long Installation Takes for a Typical Orlando Kitchen
Most standard kitchen countertop installations at i4 Kitchen & Bath are completed in one day. Larger kitchens, more complex layouts, or projects with multiple islands or custom details may require additional time. Your designer will give you a specific installation timeline estimate at your consultation based on your project scope.
The Seam Question: What to Expect and What Is Normal
Seams are a common concern for homeowners, and it is worth addressing directly. Whether seams are needed depends on your kitchen layout, slab size, material, and fabrication requirements. Not every kitchen requires visible seams. For larger countertop runs, corners, and around sink cutouts, seams are often necessary.
What makes the difference is placement and execution. Experienced installers plan seam placement carefully so they fall in less visible areas and align naturally with the material’s pattern. Some visibility is always possible depending on the pattern, lighting, and color of the material. In most cases, our clients are surprised by how minimal the seams look when installation is done by an experienced team.
What Orlando Homeowners Love About Our Installation Process
Almost every homeowner tells us afterward that installation day was easier than they expected. The old countertops come out faster than most people anticipate. The new pieces fit with a precision that feels almost satisfying to watch. The team is professional, focused, and respectful of the space throughout.
One thing that surprises most homeowners is how different the kitchen feels the moment the new countertops go in. Even before the finishing touches are complete, the transformation is immediately visible. That is usually the moment it all feels worth it.
Step 6: Finishing Touches: The Final Hours of the Project
By the time the countertop pieces are in place, the hardest work of the day is done. What happens in the final hours is quieter, more detailed, and just as important as everything that came before.
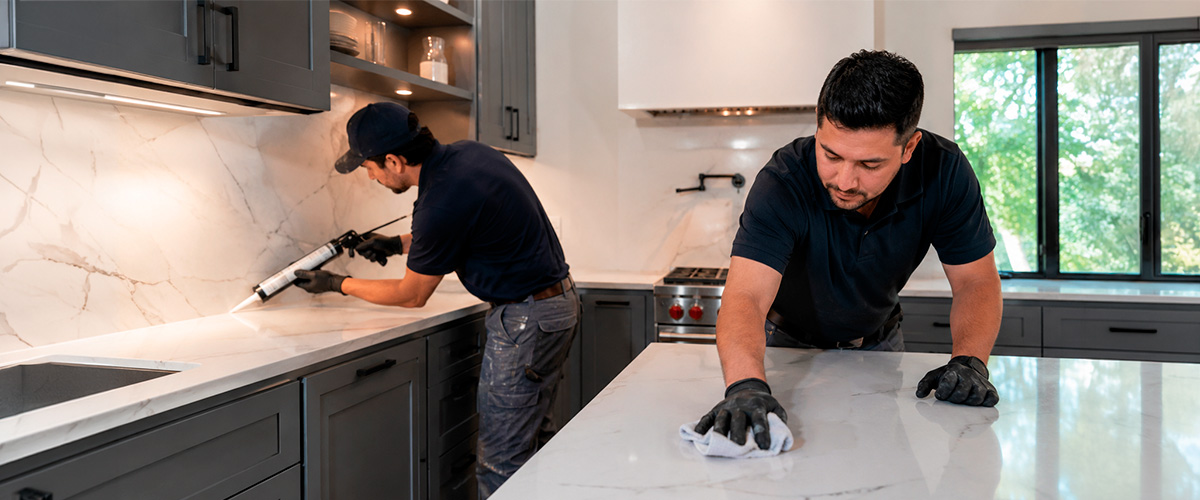
The finishing touches phase covers three things: caulking, cleanup, and sealing if your material requires it.
Caulking or silicone sealant is applied along the edges where the countertop meets the wall and backsplash, and around the sink where the sink rim or edge meets the countertop surface. This helps block moisture from reaching the cabinet structure underneath and gives the installation a clean, finished appearance. Like any sealant, it performs best when properly applied and will benefit from occasional inspection and maintenance over time, particularly in Florida’s humid conditions
If your countertop material is a natural stone like granite or quartzite, a sealer will be applied at this stage. Quartz and other engineered surfaces do not require sealing. Your installer will confirm what finishing treatments apply to your specific material before they begin.
Cleanup happens throughout the day as the team works, and a final cleanup is done before they leave. The goal is to hand your kitchen back to you in better condition than they found it.
When Can You Actually Use Your Countertops?
Depending on the countertop material, light use of the surface might be possible the same day. The area to be careful about is around the sink. Most silicone and caulk products used in countertop installation require approximately 24 hours before heavy water exposure to cure properly. Avoid running water directly over fresh caulk lines or leaving standing water near the sink edge for the first day.
If your material is a natural stone that has been sealed, most sealers need 24 to 48 hours to fully set before the surface sees heavy use or moisture. Our team will confirm the exact aftercare instructions for your specific products before they leave.
The first 48 hours are mostly about giving everything time to settle. Wipe up spills when they happen, use a trivet for hot pots and pans, and try to keep water away from fresh caulk around the sink until it has fully cured. Simple stuff, but it helps your new countertop start off right.
Pro Tip: Florida humidity can slow things down a little after installation, especially when it comes to caulk and sealant curing. On extra humid days, they may need more time than the label suggests.
If your countertop installation happens during one of those heavy, sticky Florida weeks, our team will walk you through what to expect and how long to wait before heavy use or water exposure. It is a small detail, but it helps protect the finished installation.

Step 7: What to Inspect Before You Sign Off
Before you sign off, review every detail of the installation before our team leaves:
- Edges: Run your hand along every exposed edge. They should feel smooth and consistent with no sharp points or rough spots.
- Seams: Check every seam. They should be tight, even, and as minimal as possible given your material and layout.
- Overhang: Check the overhang along your island or peninsula. It should be consistent all the way around.
- Sink cutout: The area around the sink should be clean, smooth, and properly caulked with no gaps.
- Corners: All corners should be consistent with the edge profile you chose. Sharp corners should be crisp. Rounded profiles should be even.
- Level: The countertop should sit flat with no rocking or uneven sections.
- Color consistency: The installed material should match the slab you approved. Check it under different lighting if possible.
- Caulk lines: All caulk lines should be clean, even, and complete with no gaps along the wall, backsplash, or sink edge.
What to Do If Something Does Not Look Right
Let us know before the team leaves. Our expert installers will review that every concern has been addressed to your satisfaction.
Pitfalls to Avoid: Common Mistakes During the Countertop Installation Process
Even smooth projects can hit unnecessary bumps when homeowners are not sure what to expect. Here are the most common mistakes to avoid:
Not clearing countertops completely before the team arrives:
Leaving items on the counter or under the sink slows the team down and can lead to accidental damage to your belongings.
Not being home during installation:
Someone needs to be available to answer questions and make real-time decisions. An empty house creates delays.
Waiting to report a problem:
If something does not look right, let us know immediately, before our team leaves. Problems are always easier to resolve on installation day.
Not asking for aftercare instructions before the team leaves:
Caulk cure times, sealer instructions, and first-use guidance vary by material. Make sure you have that information before anyone walks out the door.
Using cleaners immediately after installation:
Give your new countertops a few days before introducing any manufacturer-approved cleaning products. Never use harsh cleaners after installation; limit to warm water and mild soap.
Countertop Installation Process FAQs
Here are the questions we hear the most often at our showroom from homeowners who are close to starting their countertop project.
What should I expect during countertop installation in Orlando?
Countertop installation typically involves removing your old countertops, installing pre-fabricated pieces cut to your kitchen’s exact measurements, and completing finishing touches including caulking and sealing if your material requires it. Most standard kitchen installations are completed in one day. Expect some noise and dust during removal, which is usually the quickest part of the day.
How long does the countertop replacement process take in Orlando?
For most countertop replacement projects in Orlando, the process from first consultation to completed installation typically runs 2 to 3 weeks. After template approval, fabrication takes approximately 10 to 14 business days depending on material and demand. Installation is typically completed in one day. Your designer will give you a precise timeline at your free consultation.
How do I prepare my home for countertop installation?
Clear everything off your countertops completely, remove all items from under-sink cabinets, secure pets in another room, and make sure someone is home for the full installation day. Plan for meals since your kitchen will be out of use. Save your designer’s contact number in case any questions come up during the day.
What questions should I ask my countertop installer?
Ask about the fabrication and installation timeline for your specific project, whether templating is included, how seam placement will be handled, what finishing treatments your material requires, and what aftercare is needed in the first 24 to 48 hours.
How long after installation before I can use my countertops?
Depending on the material, light use of the countertop surface is typically possible the same day. Most silicone and caulk products require approximately 24 hours before heavy water exposure near the sink. Natural stone sealers generally need 24 to 48 hours to fully set. Your i4 team will give you specific aftercare instructions before they leave.
Will there be seams in my new countertops?
Whether seams are needed depends on your kitchen layout, slab size, material, and fabrication requirements. Not every kitchen requires visible seams. When seams are necessary, experienced installers plan placement carefully to minimize visibility. Some visibility is always possible depending on pattern, lighting, and color. In most cases, homeowners are surprised by how minimal well-executed seams look.
What should I check after my countertops are installed?
During the final walkthrough, check edge smoothness, seam tightness, overhang consistency, the area around the sink, corner profiles, whether the surface sits level, color consistency with the approved slab, and caulk line quality along the wall and backsplash. Raise any concerns before the team leaves. That is exactly what the walkthrough is for.
Will there be dust and mess in my kitchen during installation?
Yes, some dust and noise should be expected, particularly during removal of the old countertops. Our expert installation team protects your floors, cabinets, and surrounding surfaces throughout the process and performs a thorough cleanup before leaving. The removal phase is typically the most disruptive part of the day and is usually completed quickly.
What if unexpected damage is found under my old countertops during removal?
This is more common than most homeowners expect, particularly in older Orlando homes. When old countertops come off, the team may find water damage, soft spots in the substrate, or uneven cabinet surfaces that need to be addressed before new countertops can be installed. At i4 Kitchen & Bath, our team inspects the substructure during demolition and repairs any deficiencies before installation begins. Our installation team will communicate any findings and discuss next steps before proceeding.
You Are More Ready Than You Think
Most homeowners tell us afterward that the process was much easier than they expected going in. Now that you know exactly what happens at every stage, what to prepare, what to look for, and what to do if something is not right, you are already ahead of where most people start.
The first step is the easiest one. Come in for a free design consultation, ask every question on your mind, and let our team show you what your new countertops could look like. We have done this hundreds of times in Orlando and across Central Florida, and we are ready to do it for you.
Beautiful Countertops built to impress and last.
Schedule a free consultation by calling (407) 246-0636 or filling out acontact form. Visit our countertop installation in Orlando service page or explore our inspiration gallery before you visit our showroom.
References
- Natural Stone Institute, sealer application and maintenance guidelines: https://www.naturalstoneinstitute.org
- Cambria, countertop care and installation guidelines: https://www.cambriausa.com
- NAR and NARI 2025 Remodeling Impact Report: https://www.nar.realtor/research-and-statistics/research-reports/remodeling-impact